Getting Started in Coding with Python for Beginners (Part 2)
Okay, as promised, we are going to cover using Jupyter Notebook as our IDE to work on our Python code. Assuming you have read the first part, which you can find here, you should have your Anaconda ready by now.
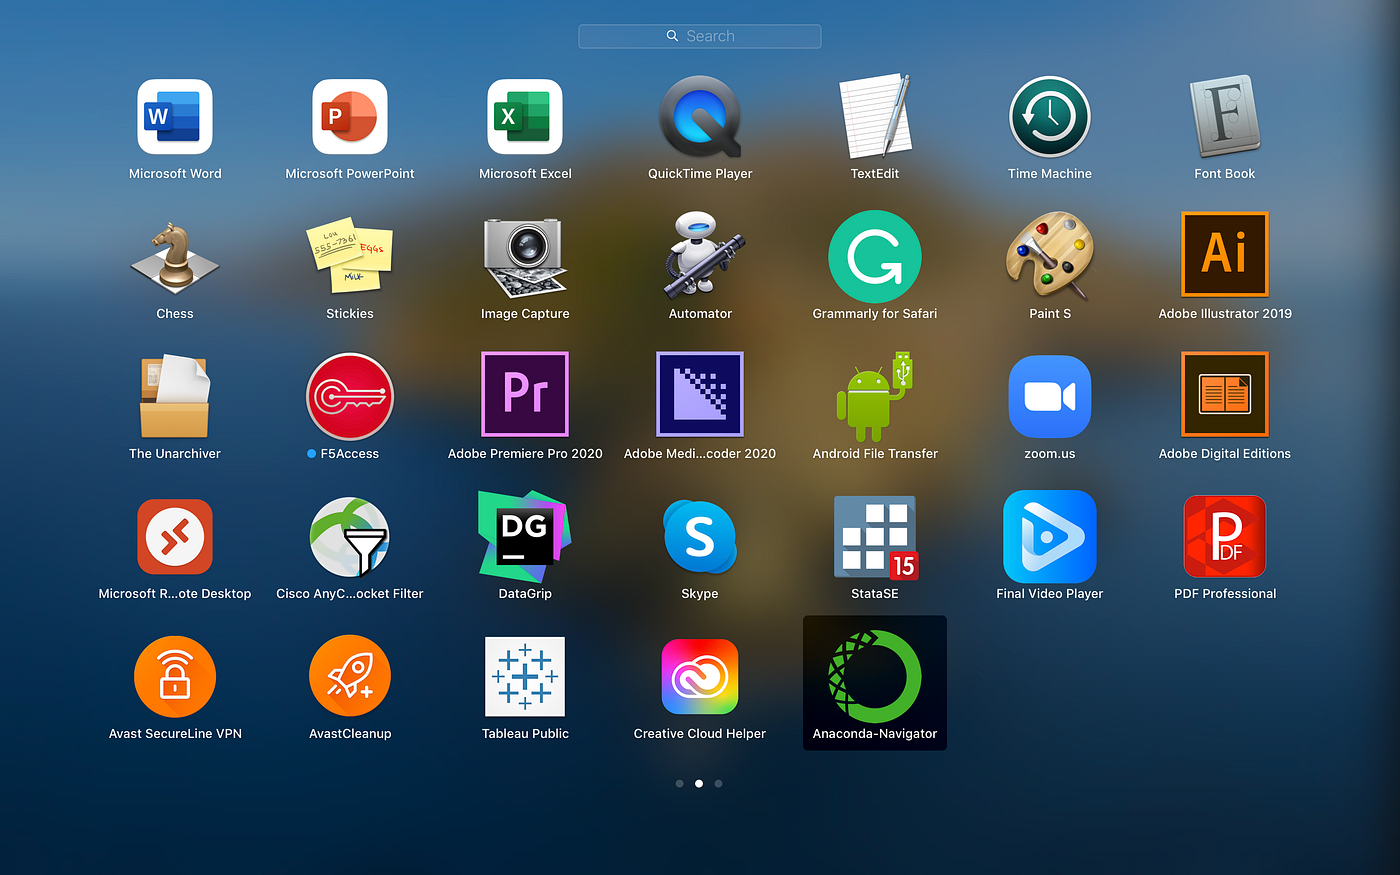
To start, click the Anaconda-Navigator icon. It’s the one that looks like a green ring.
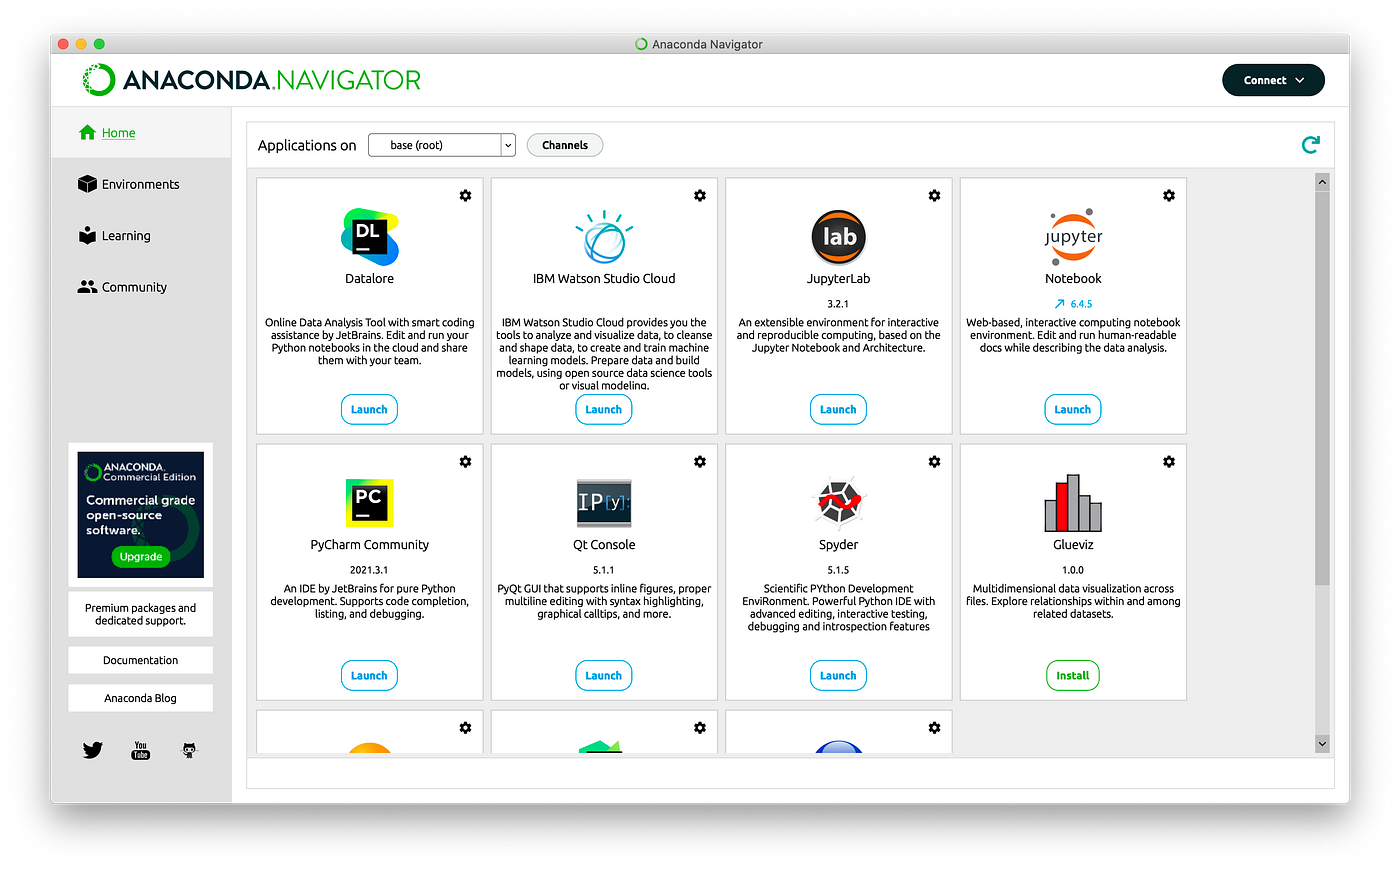
Then, launch Jupyter Notebook. On the picture below, it’s on the top right corner.
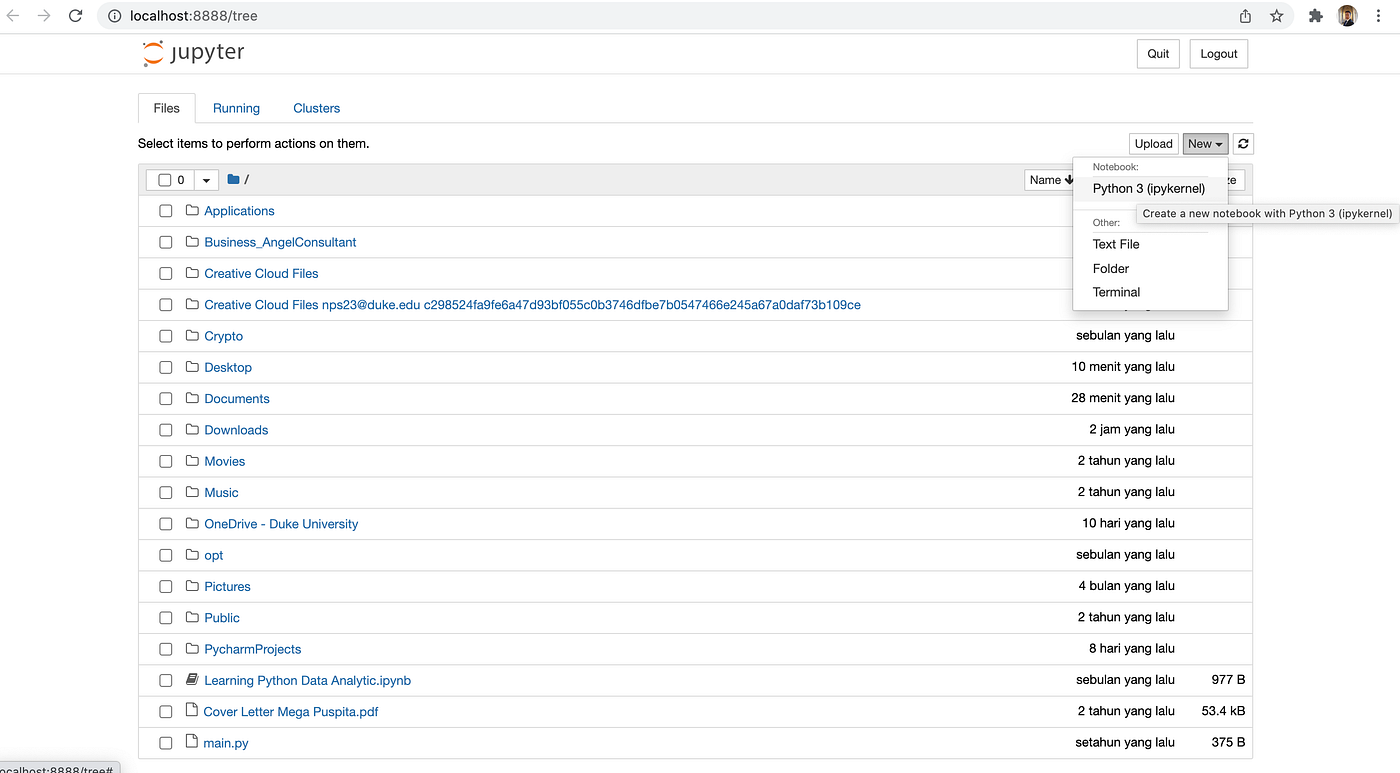
After launching Jupyter, the program will start running on your terminal or command prompt, and subsequently open Jupyter Notebook on your browser.
On the Jupyter interface, you can load an existing notebook if you have any. Assuming that you don’t, let’s make a new one by clicking “New”, then choose “Python 3(ipkernel)”. This action will open a new tab on your browser.
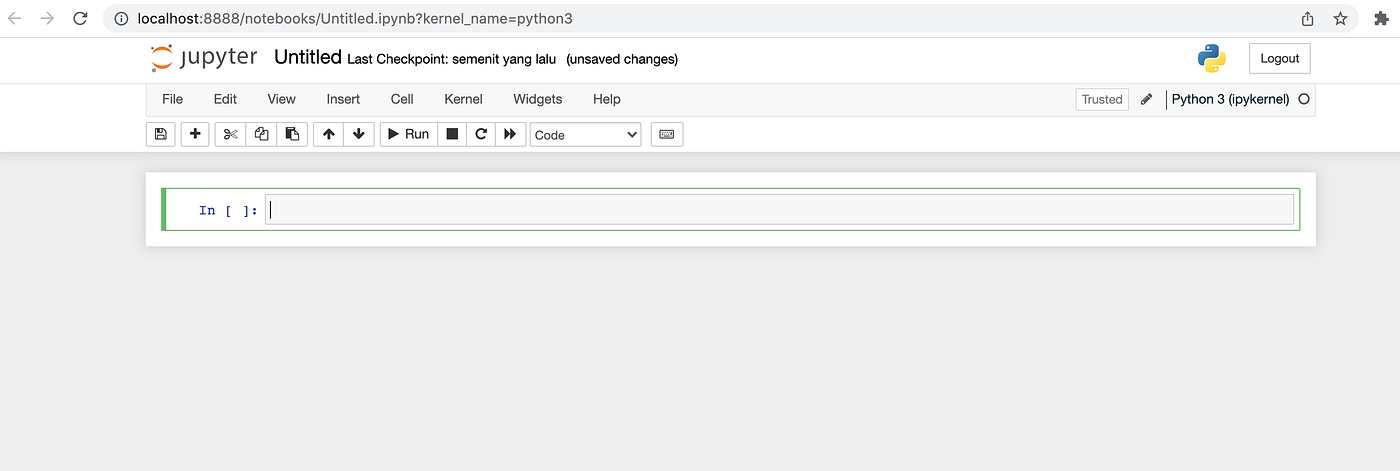
Below is the new tab. See the green box below? We call it a “cell”. That is where we write our code in.
Now, let’s write the ‘Hello world’ code just like in the previous part, by typing print(‘Hello world’). To execute the code, press ‘shift+enter’ or ‘shift+return’ if you are using a Mac. The output is printed right below the box.
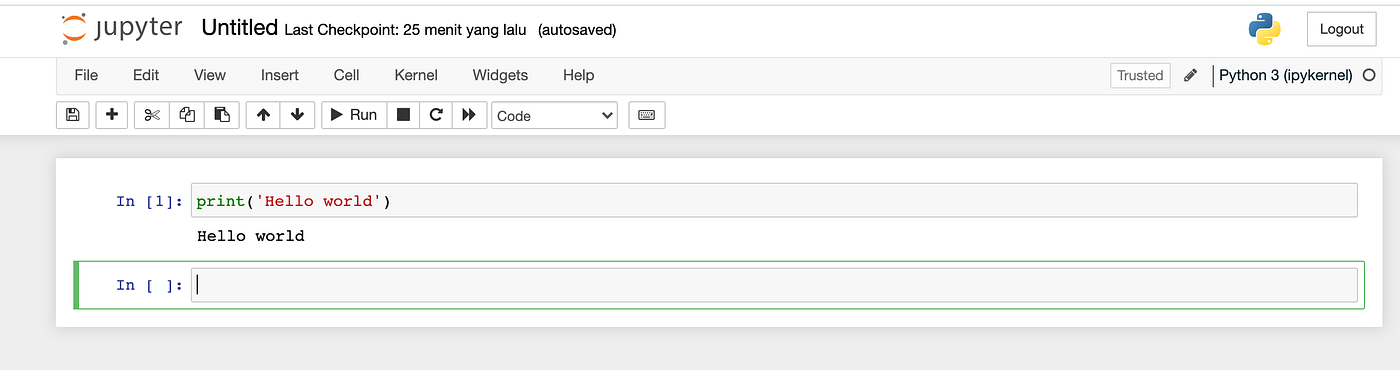
If you want to modify your code, you can just click the box, retype your code, and execute it again.
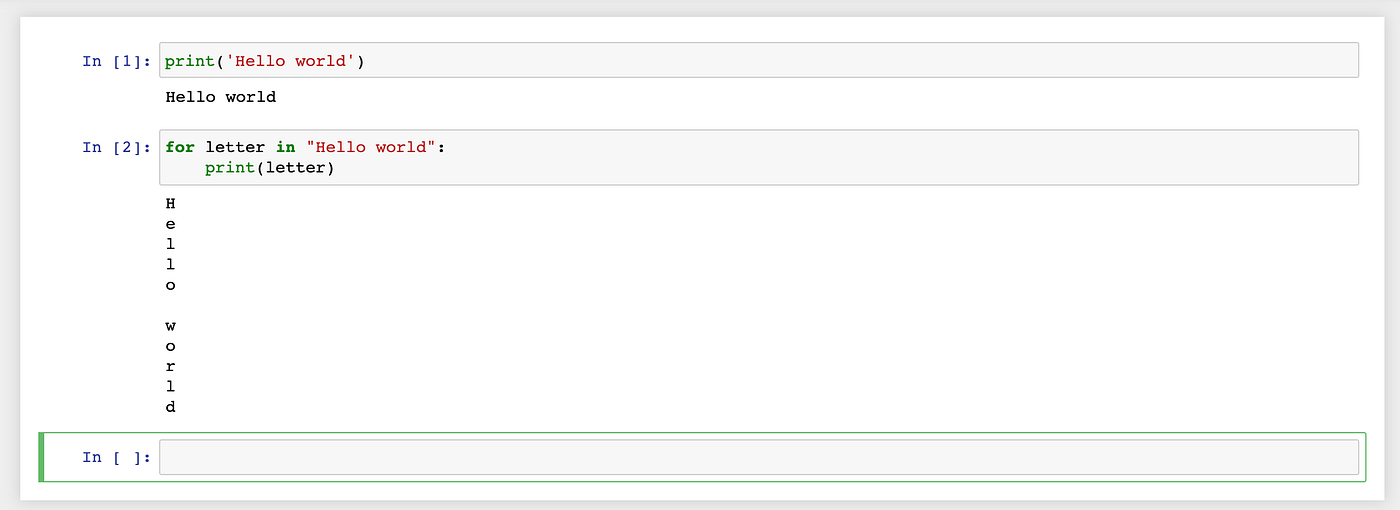
You can also write a function over multiple lines in a box. You just need to press enter or return in the cell to make a new line. Jupyter will color the Python source keywords approprately. For example, let’s make a basic loop code (which will be covered in the next part) in a cell. To do so, type ‘For letter in “Hello world”:’ then press ‘enter’. Jupyter will move your cursor to a new line below it with appropriate indentation. Then, type ‘print(letter)’. You should get outputs like below.
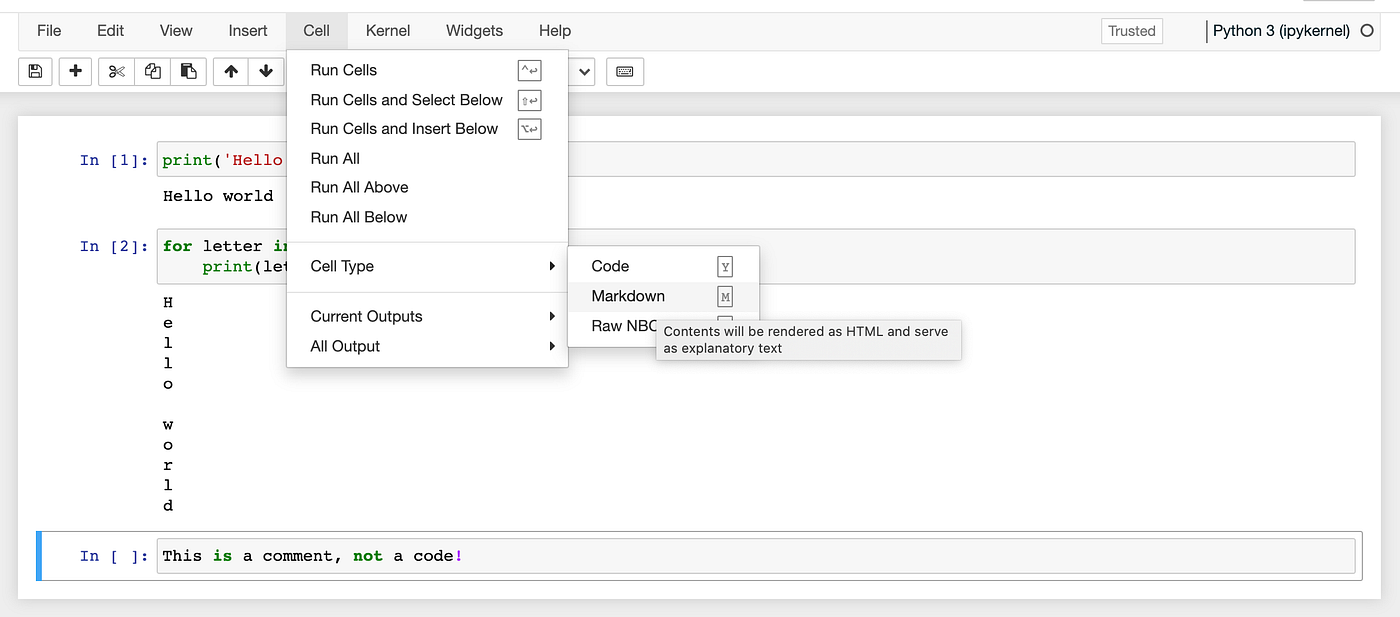
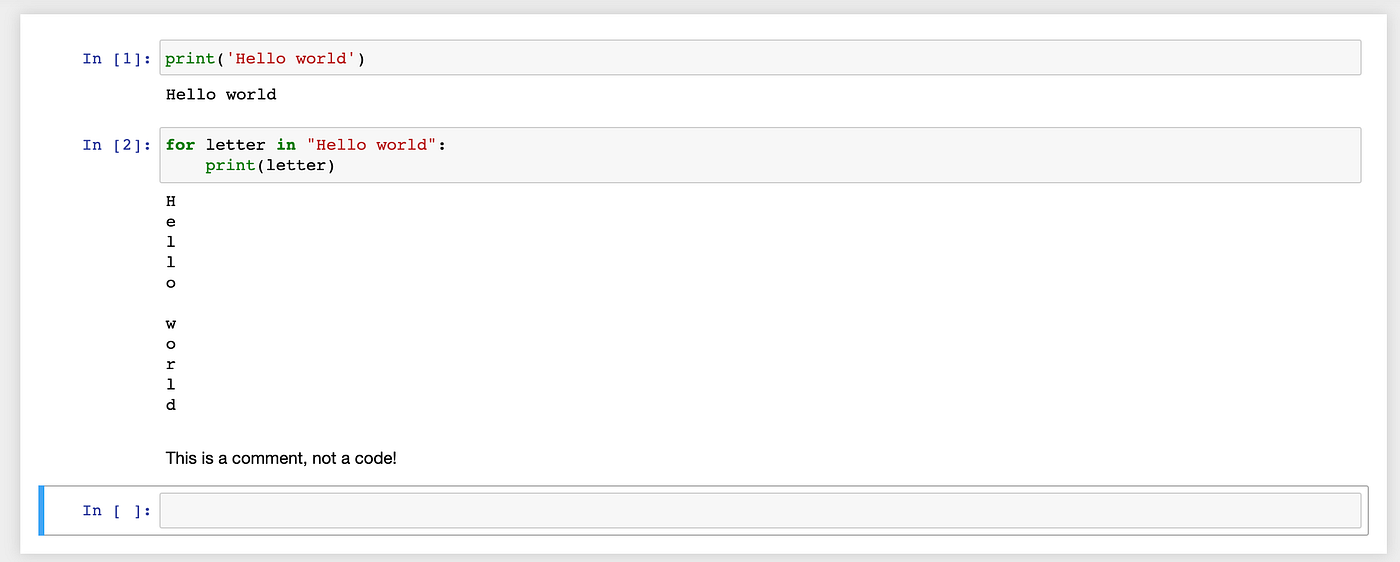
A cell can also contain a regular text rather than just a code. This can be very useful to make comments or telling the stories behind your codes. You do so by clicking the cell, then type your comments there. For example, I typed “This is a comment, not a code!”. Next, go to ‘Cell’ on the menu bar and choose ‘Cell Type >> Markdown’, then execute by pressing ‘shift+enter/return’.
The result will be like below:
Markdown is a very useful text format. It can make headings or do basic formatting, like bold, italic, bullet points, hyperlinks, and even mathematical formulas. Make a heading with adding ‘#’ in front of your sentences, use two asterisks (‘**’) between words for bold or one asterisk (‘*’) for italic, use one asterisk in the front of a sentence followed by a space to make a bullet point, and create a mathematical formula between dollar signs.

These are the outputs after excuting:

You can also easily copy, cut, paste, and delete a cell. To copy, click on the cell that you want then press ‘C’ on your keyboard. To cut, press ‘X’, and ‘V’ to paste. To delete, you need to press ‘D’ twice. Jupyter wants to make sure that you really wants to delete the cell. The previous version of Jupyter would require you to press ‘Esc’ together with the buttons, but it is not needed anymore. Jupyter saves our code periodically, but you can also do that by pressing ‘command+S’. Pretty easy, right?! Now you are ready for typing basic Python codes, which I will show in the next part! See you!


Comments
Post a Comment